Inspection
1. Loosen the wheel nuts. Raise the vehicle and place secure supports under it. Remove the wheel and screw on the wheel nuts to hold the disc in place. If you are working on the rear brake disc, release the parking brake.
Attention! If the vehicle is equipped with electronically controlled air suspension, turn off the suspension height control switch before raising the vehicle.
2. Remove the brake caliper as described in paragraph 4. You don't need to disconnect the brake hose. After removing the caliper bolts, hang the caliper out of the way using a suitable piece of wire (pic. 3.6, g.). Remove the caliper bracket bolts, and then remove the bracket (Figure 5.2, a, b).
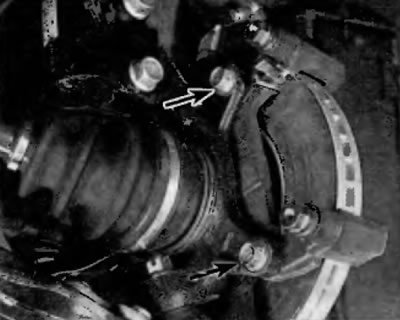
Pic. 5.2, a. To remove the front caliper bracket from the steering knuckle, remove the two bolts
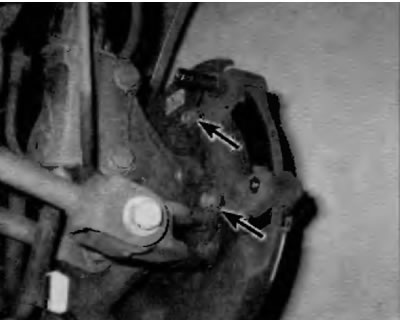
Pic. 5.2b. To remove the rear caliper bracket from the hub support, unscrew the two bolts
3. Visually inspect the disc surface for scratches or other damage. The presence of light scratches and small grooves is normal for a disc that has been in use and may not always be detrimental to brake performance, but deep scratches (deeper than 1.0 mm) require removal of the disc and re-surface treatment at the service station. Check Both Sides of the Disc (pic. 5.3). If a pulsation is noted during the operation of the brakes, the presence of a beating disc is suspected.
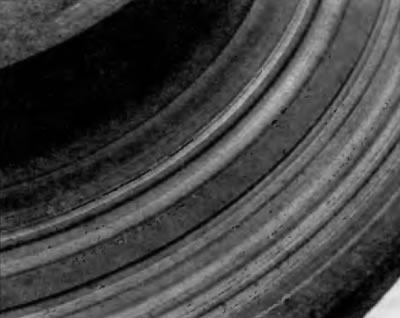
Pic. 5.3. It can be seen that the maintenance of the brakes on this car was neglected, as the brake pads are completely worn out, and there are deep scratches on the disc. This wear is very serious and the disc should be replaced
4. To check for disc runout, move the dial indicator plunger to a point approximately 12 mm from the outer edge of the disc (pic. 5.4, a). Zero the indicator and rotate the dial. The indicator reading should not exceed the maximum allowable beat value. If it exceeds, the disc should not be reground by a service station.
Note. Professionals recommend regrinding the disc every time the brake pads are replaced, regardless of the dial indicator reading, as this ensures a high quality surface and guarantees a perfectly flat surface, eliminating any brake pedal pulsing or other unwanted signs of failure. If you are not going to re-sand the discs, at least sand the surface of the disc using a whirling motion (pic. 5.4, b).
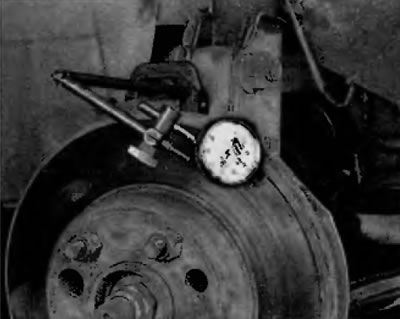
Pic. 5.4, a. Use a dial gauge to check disc runout. If the reading exceeds the maximum allowable value, the disc must be reground or replaced
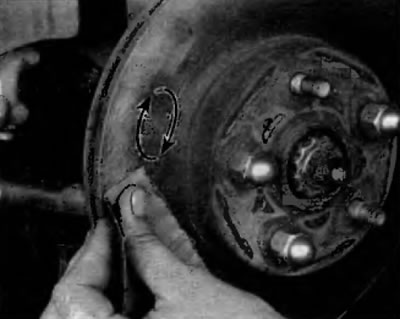
Pic. 5.4b. Using swirling motions, clean the surface of the disc with sandpaper
5. When regrinding a disc, never reduce its thickness below the prescribed minimum value. Minimum Thickness (rejection thickness) indicated on the inside of the disk (pic. 5.5, a). Disc thickness can be checked with a micrometer (pic. 5.5, b).
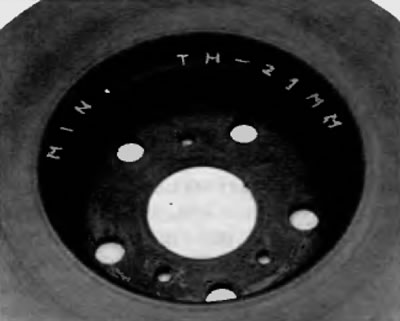
Pic. 5.5, a. The minimum thickness, taking into account wear, is usually indicated on the back of the disc
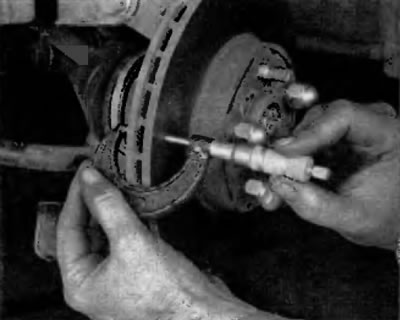
Pic. 5.5b. Use a micrometer to measure disc thickness
Removing
6. Remove the wheel nuts that were used to hold the disc in place and remove the disc from the hub. If the rear disc does not come off, the parking brake pads may be the cause. Remove plug (pic. 5.6, a) and turn the adjuster to move the parking brake pads away from the surface of the drum built into the disc (pic. 5.6, b).
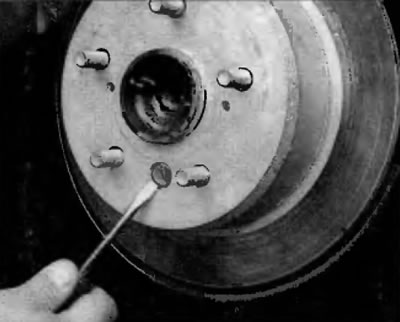
Pic. 5.6, a. If the rear disc won't come off, remove the plug...
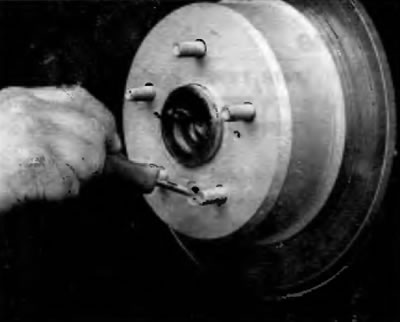
Pic. 5.6b.... insert a screwdriver through the hole (hole must be in position «6 hours», because that's where the regulator is located) and turn the adjuster to atheist parking brake pads away from the surface of the drum built into the disc
Installation
7. Install the disc, orienting it to the studs.
8. Install the caliper bracket and tighten the bolts to the specified torque listed in the Specifications at the beginning of this chapter.
9. Install the caliper and tighten the bolts to the specified torque specified in Specifications at the beginning of this chapter. If the brake hose has not been disconnected from the caliper, the bleed procedure is not required.
10. If installing a rear disc, adjust the parking brake pads as described in paragraph 10.
11. Establish a wheel and screw nuts of its fastening. Lower the vehicle and tighten the wheel nuts to the specified torque specified in Specifications at the beginning of this chapter. Depress the brake pedal several times to bring the brake pads into contact with the disc. Before entering the vehicle into normal operation, carefully check the operation of the brakes.
