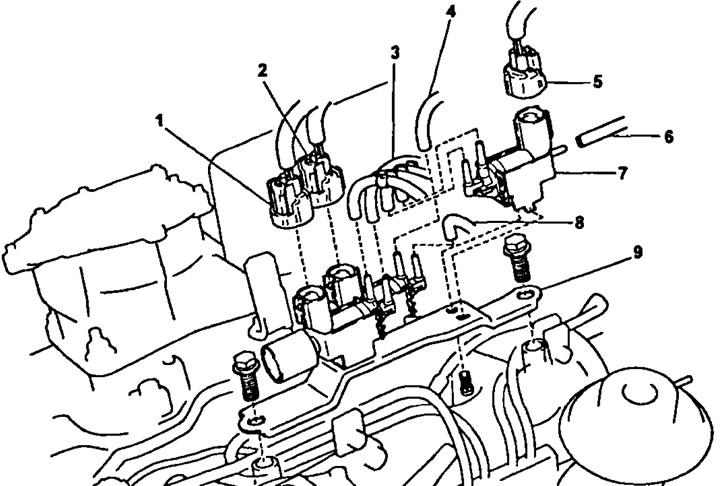
Removal and installation of electropneumatic valve: 1 - connector for the electro-pneumatic valve of the boost pressure corrector, 2 - connector for the electro-pneumatic valve for increasing the speed when the air conditioner is turned on, 3, 4, 6, 8 - vacuum hose, 5 - connector for the electro-pneumatic valve for controlling the boost pressure, 7 - electro-pneumatic valve for controlling the boost pressure, 9 - bracket
Checking the electro-pneumatic valve
1. Remove the electro-pneumatic valve.
2. Check the electro-pneumatic valve.
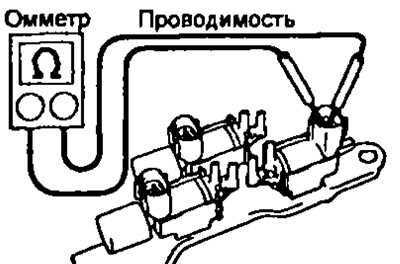
- A) Using an ohmmeter, check for continuity between the leads. Resistance (at 20°C) - 22-28 Ohm.

- b) Using an ohmmeter, check for continuity between each terminal and the valve body.

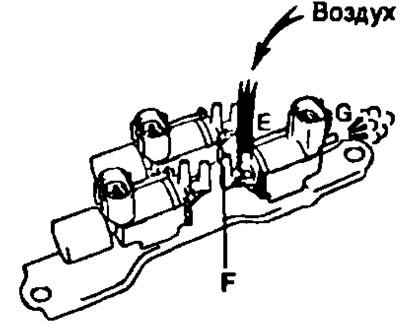
- V) Check that when air is supplied to the port "E" it does not leave the port.

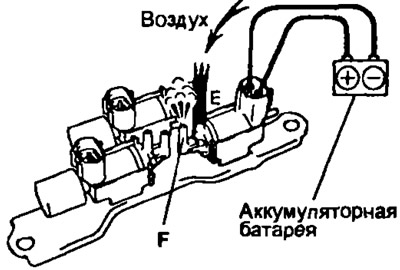
- G) Apply voltage from the battery to the terminals of the solenoid valve. Check that when air is supplied to the port "E" it leaves the port "F".
3. Install the electro-pneumatic valve by tightening the bracket mounting bolts.
