Note. Before adjusting the position of the door in vehicles equipped with side airbags and curtain airbags, you must disconnect the negative (–) terminal from the battery terminal. After adjustment, check the operation of the additional safety equipment warning lamp (SRS), side airbags and curtain airbags.
The sequence of actions is the same for the right and left sides of the car.
The operations to be carried out on the left side of the vehicle are described below.
Centering bolts are used to attach door hinges to the body and door. It is not possible to adjust the door with the center bolts installed. When adjusting, the centering bolts should be replaced with standard bolts (with washers).
Bolt tightening torque for which no value is given can be found in the table at the beginning of the section.
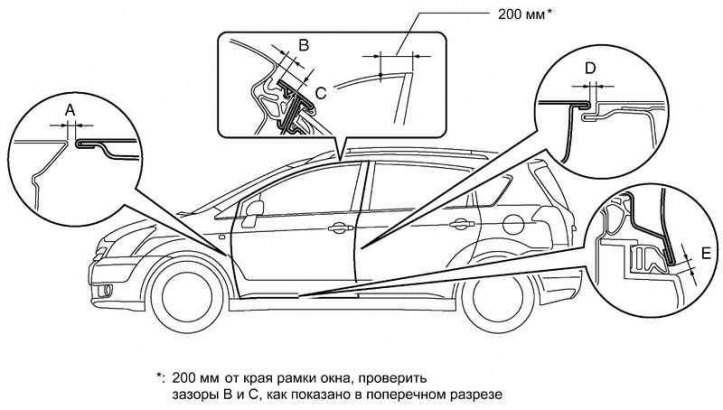
Check the front left door.

Pic. 8.38. Front Door Adjustment Test Diagram
Make sure that the clearances marked A to E do not exceed the nominal values (pic. 8.38).
Adjust the front left door.
Rated values

Disconnect negative (–) wire from the battery terminal.
Attention! Work must be started no earlier than 90 seconds after the ignition is turned off (OFF) and disconnect the negative battery terminal. (The safety features system has its own backup power supply. If you start work before 90 seconds after disconnecting the negative terminal from the battery and turning off the ignition (OFF), the system of additional security measures may be accidentally activated (SRS).)

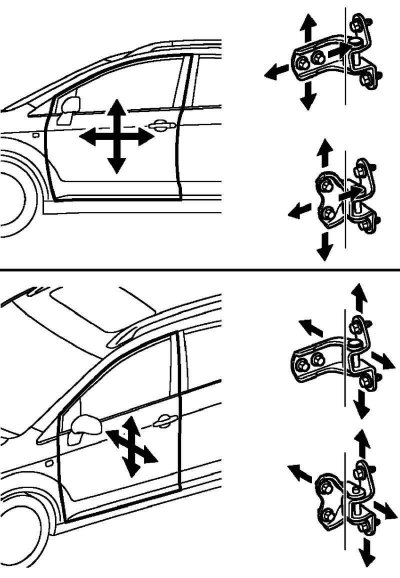
Pic. 8.39. Front door adjustment scheme in different planes
Using the special tool SST, adjust the door in the horizontal and vertical plane, loosening the bolts securing the door hinges to the body (pic. 8.39).
After adjustment, tighten the hinge bolts to the body.
Tightening torque: 26 Nm.
Adjust the door horizontally and vertically by loosening the bolts securing the hinges to the door.
After adjustment, tighten the bolts securing the hinges to the door.
Tightening torque: 26 Nm.

Pic. 8.40. latch adjustment
Adjust the position of the door lock latch by loosening the latch fixing screws and hitting it with a plastic mallet (pic. 8.40).
After adjustment, tighten the latch fixing screws.
Tightening torque: 23 Nm.
Connect negative (–) wire to the battery terminal.
Check the SRS warning light.
