Removing
Disconnect ground cable (-) from the battery.
Attention: As a result, entries in the memory of the on-board computer are erased, in particular, the fault record and the radio code. Before disconnecting the battery, read the contents of the section "Removing and installing the battery".
Drain coolant.
Remove air filter.
Disconnect the earth cable at the top of the gearbox.
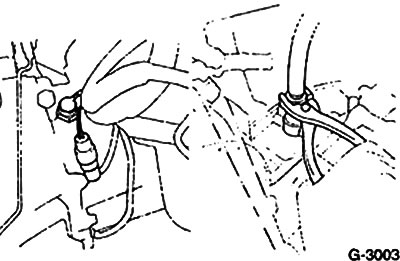
Disconnect the reversing light cable from the transmission.
Loosen the tachometer drive shaft locknut. Remove the tachometer shaft.
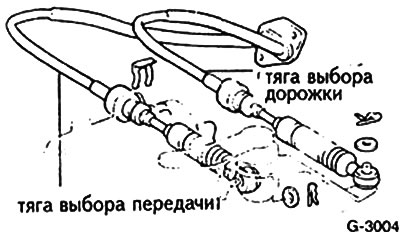
Remove the gearshift linkages. To do this, remove the safety pin with special pliers. Remove the safety washers at the tie rod support.
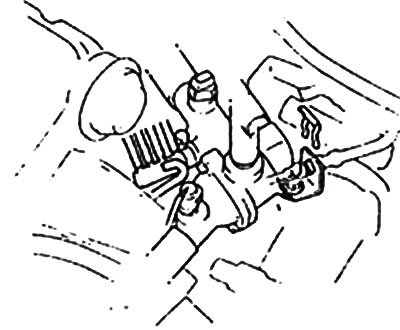
For 121 hp engines only: Disconnect the coolant connection on the gearbox housing. To do this, unscrew 1 bolt and nut.
Remove the bolts securing the hydraulic actuator to the crankcase. Remove hydraulic cylinder and hang on a wire to the body.
Raise the front of the car.
Remove the bottom cover of the engine compartment.
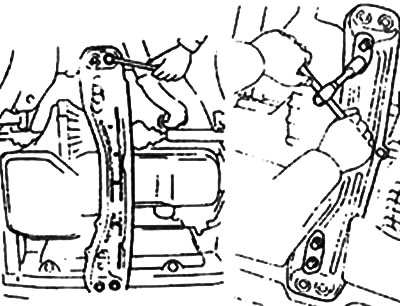
Unscrew the bolts securing the box from the crossbar. After that, give the fastenings of the crossbar from the body to the crossbar.
Loosen the mounting bolts for both drives of the gearbox flange. To gain access to the flange, first remove the protective casing.
Remove left drive.
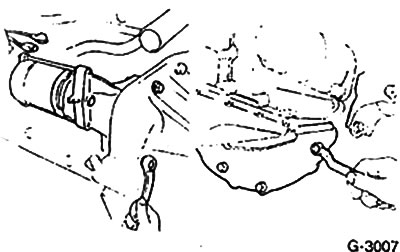
Remove the starter by unscrewing the two bolts. Disconnect the cable and connector from the starter beforehand.
To give bolts of fastening of a case of coupling if it is, look the right part of fig. G-3007.
Only for all-wheel drive vehicles
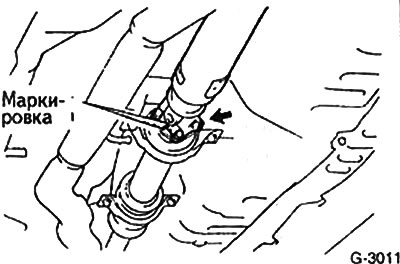
Remove the front part of the driveshaft by unscrewing the 4 bolts. Before doing this, mark the position of the flange in relation to the intermediate bearing so that it can be installed in the same position during assembly.
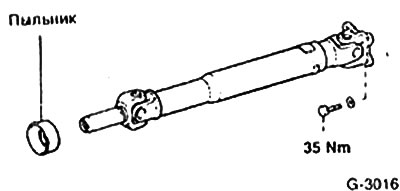
Remove the propeller shaft from the transfer case.
Attention: Place a container to catch the leaking oil. Close the opening on the gearbox with a plug.
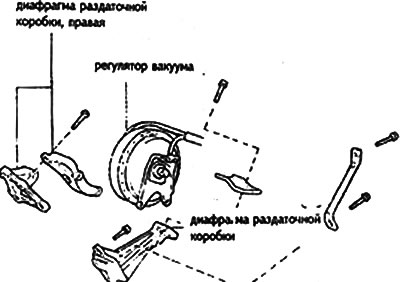
Remove spacers, diaphragm and vacuum regulator from transfer case.
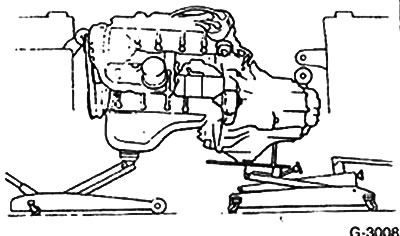
Place two workshop mobile jacks under the engine and gearbox as shown in fig. G-3008. Place wooden lining.
Place support under engine and lift slightly.
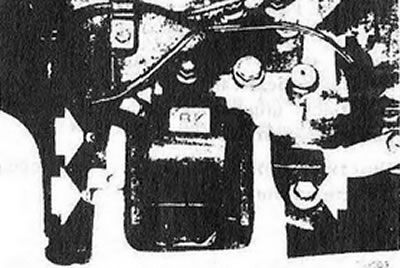
Release the left engine mount at the gearbox.
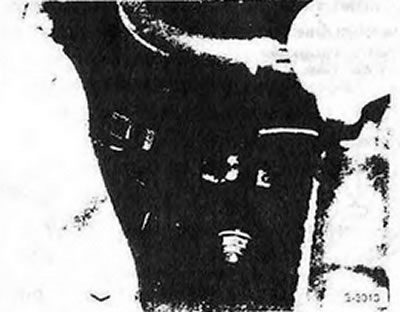
Remove the front engine mount at the gearbox and body.
Remove the three bolts connecting the engine and gearbox.
Loosen the lower power unit mounting bolts.
Lower the power unit to the left.
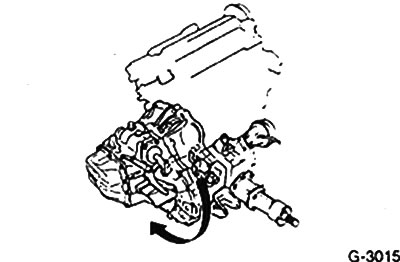
Raise the gearbox slightly by hand and separate *e from the engine with a pry bar. Attention: For a COROLLA all-wheel drive car, it is necessary to move the gearbox at a distance of 6-8 cm from the engine. Then tilt the gearbox back, see fig. G-3015. The gearbox cannot be removed in any other way, since the cylinder block touches the transfer case housing.
Lower the gearbox down with the help of an assistant.
Installation
Before installing the gearbox, you still need check clutch and clutch release bearing.
Clean the gearbox input shaft spline and coat it with a thin coat of Moly paste or spray.
Attention: If there is an excess amount of lubricant, it can get into the friction linings of the driven disk during operation, causing a malfunction of the clutch.
4WD vehicles only: Install the gearbox in the reverse order of removal.
If, when installing the gearbox, the input shaft does not fall into place in the clutch, turn the shaft (turn on the transmission) or with the help of an assistant, turn the crankshaft of the engine.
Set up the gearbox. There are guide pins on the engine flange that must fit into the holes in the clutch housing.
Reinstall all bolts and secure gearbox to engine. The tightening torque depends on the bolt diameter and is 65 Nm for 12 mm bolts and 45 Nm for 10 mm bolts.
Attention: It is not allowed to tighten the gearbox to the engine with bolts. Screw in all bolts evenly and then tighten with a torque wrench.
Raise the unit with a jack and insert it into the left engine support.
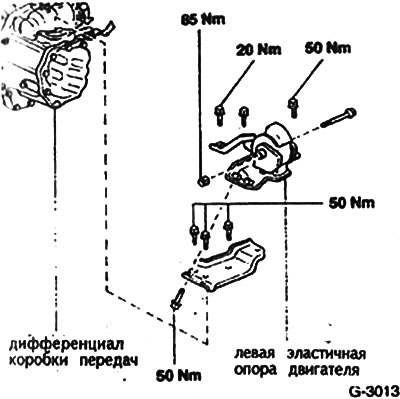
Tighten the mounting bolts on the left engine mount to the specified torque.
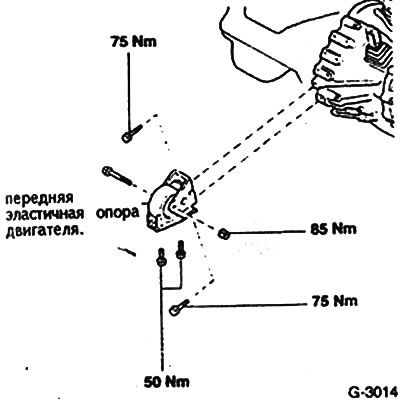
Install the front engine mount and tighten the mounting bolts to the specified torque.
Remove jack.
Only for all-wheel drive vehicles: Insert the front part of the propshaft with boot into the gearbox. Align the flange according to the marking. Insert bolts with washers. Tighten nuts to 35 Nm (see fig. G-3011 formerly).
Four-wheel drive vehicle: Attach spacers, diaphragm and vacuum regulator to the transfer box, see section "Withdrawal".
Install the clutch cover, if equipped, and secure it with bolts.
Install starter. Fasten its bolts with a force of 40 Nm.
Connect the electrical cable to the starter.
Attach the right drive shaft to the gearbox, install in place left drive shaft.
Install the protective cover on the gearbox.
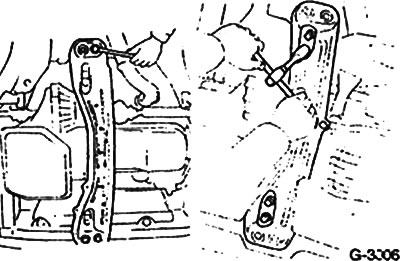
Fasten the crossbar to the bottom of the car. Tighten the four mounting bolts to 40 Nm.
Fasten the gearbox to the crossbar with a force of 40 Nm.
Install the cover on the crossbar.
Screw on the bottom cover of the engine compartment
Take the car off the lift.
Install the slave hydraulic cylinder on the gearbox housing, tighten its bolts with a force of 20 Nm.
Attach a pipeline to it.
Attach the coolant pipe to the gearbox, if it was removed.
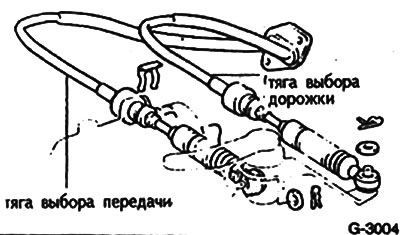
Secure the shift cables to the gearbox with clips.
Connect the shift cables to the gear levers. Install washers and cotter pins.
Connect the plug connection of the reversing light.
Insert the tachometer drive shaft into place and secure it with the union nut.
Connect the cable to the gearbox.
Install air filter.
Fill with coolant.
Check the oil level in the gearbox. Add oil if necessary, see section "Maintenance". For all-wheel drive vehicles, add oil to the transfer case, as oil leaked out during disassembly.
Connect ground cable (-) to the battery.
Set the time on the clock, if any. Enter the security code into the radio.
Immediately measure the geometrical parameters of the running gear.
