Removing the block
Disconnect ground cable (-) from the battery.
Attention: This will erase the entries in the memory of the on-board computer. In particular, a fault record and a radio code. Before disconnecting the battery, read the contents of the section «Removing and installing the battery».
Note: The steering wheel does not need to be removed. In the illustrations, the steering wheel is shown removed for a better view.
Remove trim cover steering shaft.
Vehicles since 5/87
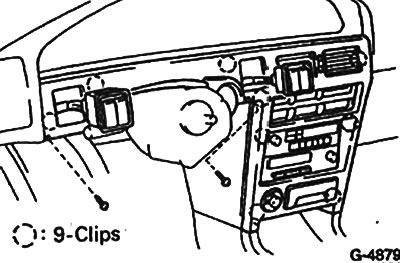
Remove the two switches on the left and right of the steering shaft with a screwdriver. Disconnect plug connection.
Loosen the two screws and remove the center trim of the dashboard kit, see illustration.
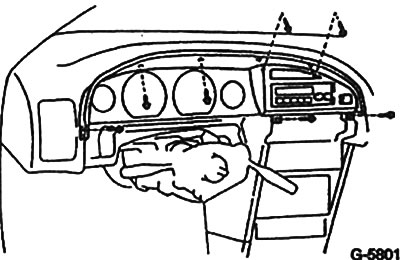
Loosen the screws securing the instrument panel trim and remove it.
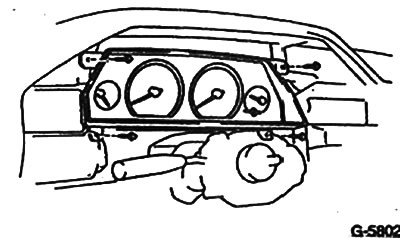
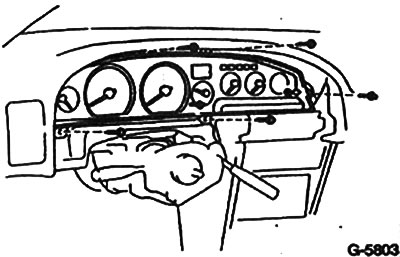
Loosen the screws and carefully remove the dashboard assembly unit. Depending on the execution, the blocks may have a different design.
Cars up to 4/87 of release
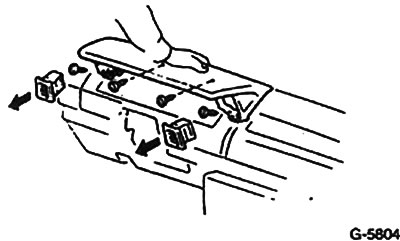
Remove, prying them with a screwdriver, the air grilles to the left and right of the dashboard kit unit.
Remove the four screws and remove the top cover (visor).
Unplug the plug connections on the back of the dashboard kit unit.
Remove the tachometer drive shaft from the speedometer.
Remove the dashboard kit assembly.
Replacement of control lamps and illumination lamps
Place the dashboard kit assembly on a clean, soft pad.
Turn the socket of the defective lamp to the left by hand or a narrow screwdriver and remove it.
Install a new bulb with socket. Installation.
Connect plug connections.
Install and secure with screws the dashboard kit unit.
Install and fasten the visor with screws.
Install the steering wheel shaft cover.
Insert trims into dashboard.
Cars from 5/87 of release. Connect the wires to the side switches and fix them on the front panel.
Connect ground cable (-) with rechargeable battery.
Set the time on the clock, if any. Enter the code into the radio.
