
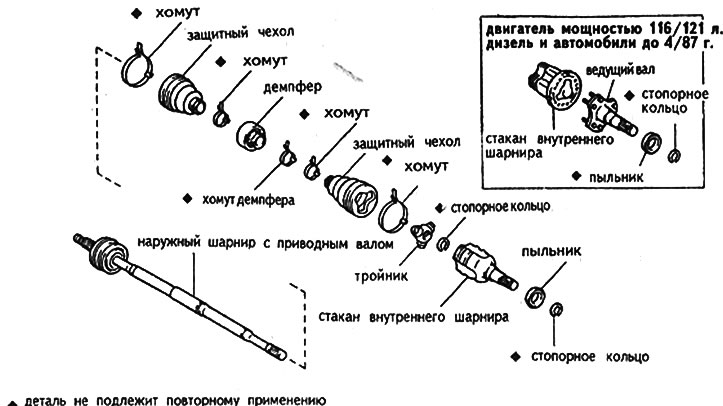
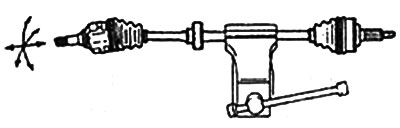
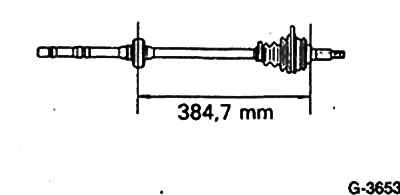
Due to the transverse position of the gearbox, the left and right drive shafts have different lengths. To reduce vibrations of the longer shaft on cars from 5/87 of release (except for all-wheel drive) balancer installed. It is a balancing weight fixed on the shaft with a clamp in a certain place.
Examination
Check protective covers. Replace damaged covers. To replace the protective cover, the drive must be disassembled. If dirt is found in the hinge, it must be flushed and filled with new grease (available in a repair kit with protective covers).
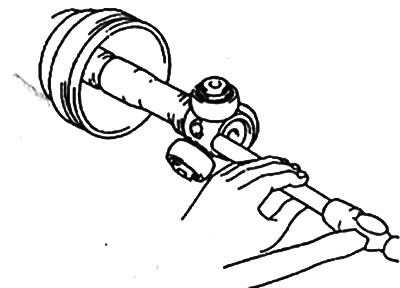
Clamp the removed shaft in a vise and check the mobility of the hinges.
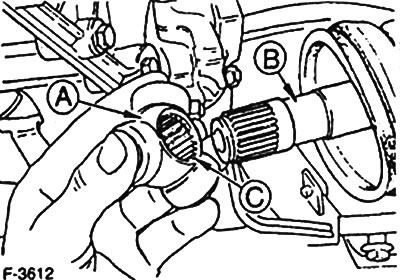
Check the play of the outer joint by hand. There should be no backlash.
The inner joint must move on the shaft.
Rotate the inner joint on the shaft. There should be no radial play.
If the check showed unsatisfactory results, disassemble the drive shaft.
Disassembly
Remove the retaining ring and dust ring from the shaft and remove the inner joint.
Mark the edges of the protective covers on the shaft with a felt-tip pen before removing them, which will facilitate their subsequent assembly.
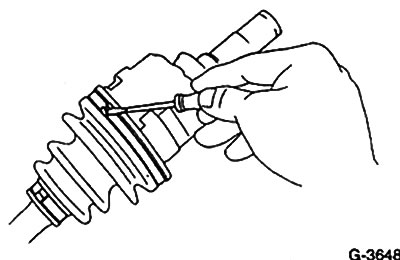
Remove the clamps securing the protective cover of the inner hinge with a screwdriver.
Slide the cover on the shaft.
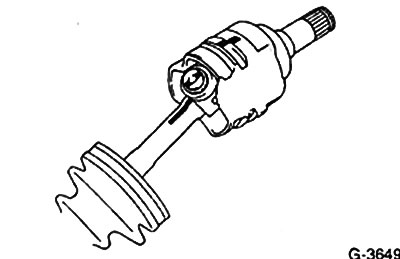
Before removing the glass, mark its position with respect to the tee with a felt-tip pen or paint.
Remove the retaining ring of the tee.
Mark the position of the shaft with respect to the tee with a punch to set it in the same position during assembly.
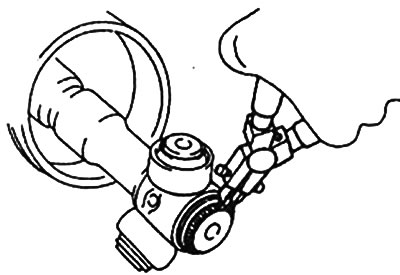
Knock the tee off the shaft with a hammer and a brass bar. Do not hit the rollers.
Remove the protective cover of the inner hinge.
Right hand drive: If there is a balancer, open the clamp and remove.
Remove the protective cover of the outer hinge, having previously removed the clamps.
Caution: Do not disassemble the outer hinge.
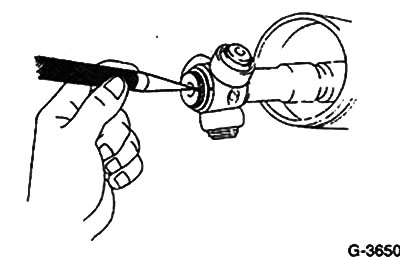
Thoroughly wipe the internal cavities of the hinge, flanges, covers and protective cover. Remove old grease.
Check wear of rolling surfaces and balls. Replace hinge if necessary.
Assembly
Replace protective covers that are porous or damaged. Just in case, it is advisable to replace all clamps and retaining rings.
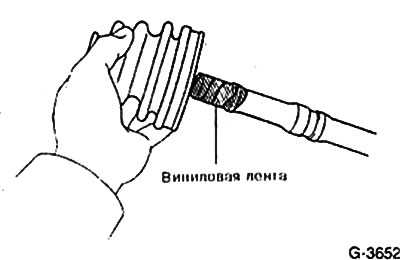
Lubricate the surface of the shaft with a thin layer for better sliding of the protective covers. Wrap the splines of the shaft with tape to protect the cover when putting it on.
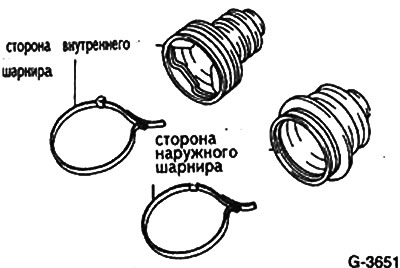
Put the clamps on the outer protective covers. Do not attach clamps. Do not confuse shaft covers. The outer hinge boot and collars are smaller than the inner hinge boot and collars.
Right drive shaft: Install, if equipped, balancer. The collar of its fastening should lie in the groove of the shaft.
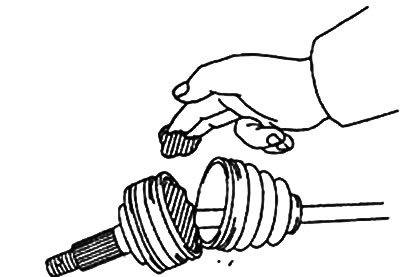
Put on the protective cover of the inner hinge.
Install a tee on the shaft. In this case, the thread on the tee must be turned inward. In addition, monitor the coincidence of the markings applied during disassembly.
Install the tee on the shaft with a hammer and brass rod. Do not hit hard with a hammer.
Install a new circlip into the shaft groove.
Fill the outer joint cavities with grease. Make sure that the grease comes into contact with the protective cover as little as possible. Grease is included in the spare parts kit with covers. The amount of lubricant introduced is 120-130 g.
Fill the inner joint cup with grease. The mass of lubricant is 210 g for engines with a power of 116/121 hp, diesel engines and cars up to 4/87, for cars of other types: 180-190 g.
Install the tee in the same position as before disassembly and put on a protective cover.
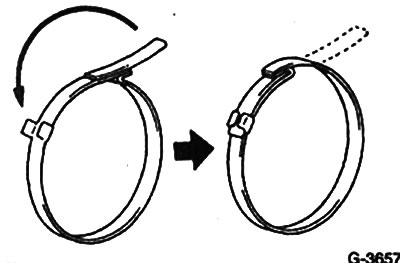
Fasten the protective covers on the large diameter with clamps. The covers must fit into the grooves of the shaft. Bend the clamps with a screwdriver and fix as shown in fig. G-3657.
Slide the protective covers over the small diameter up to the marking on the shaft. Make sure that the covers are not stretched. Tighten clamps.
Put on the dust ring, securing it with a new retaining ring.
Install the front wheel drive shafts.