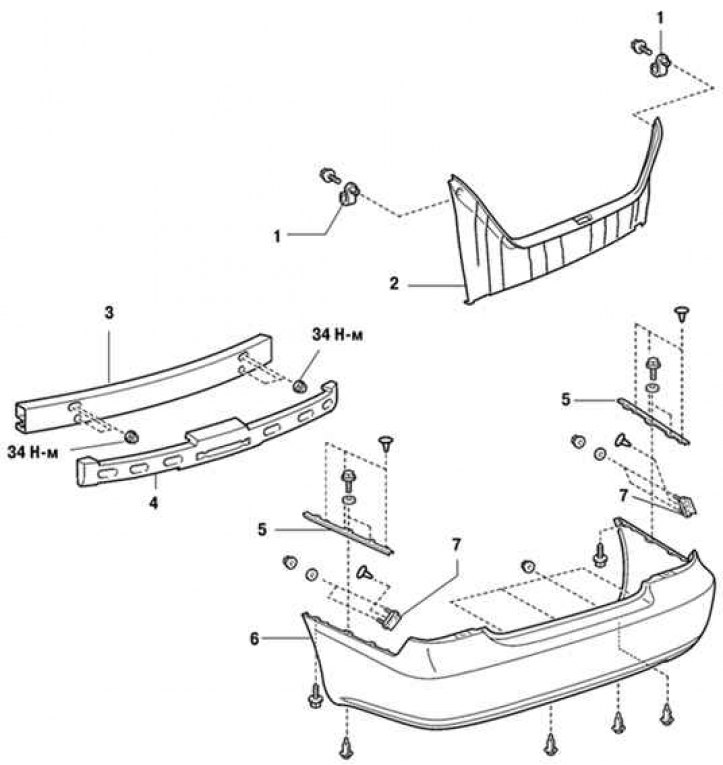
Pic. 8.37. Dismantling components of the rear bumper: 1 - brackets for fastening the lining of the trunk; 2 – facing of a luggage carrier; 3 - bumper amplifier from the side of the body; 4 - bumper shock absorber; 5 - side bumper holders; 6 - rear bumper; 7 - internal fixator
The dismantling components of the rear bumper are shown in fig. 8.37.
Install in the reverse order of removal.
Remove the luggage compartment floor mat.
Take out the spare wheel assembly with mounting bracket.

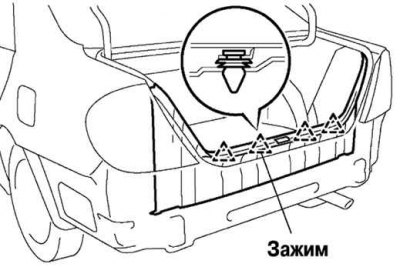
Pic. 8.38. Removing the lining of the trunk
Disconnect the clips and remove the lining of the trunk (pic. 8.38).
Disconnect the two clips and remove the interior trim of the trunk.
Unscrew the eight nuts, four bolts and disconnect the four clips of the rear bumper.

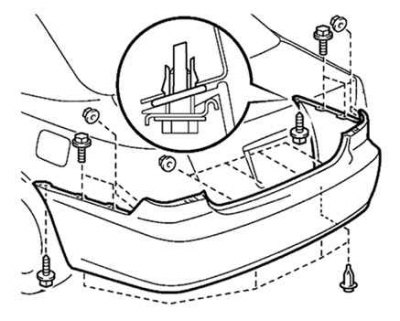
Pic. 8.39. Removing the rear bumper
Unscrew the two screws, remove the side bumper holders and remove the rear bumper (pic. 8.39).
Remove the caps and remove the clips from the inside of the bumper.
Remove the bumper damper.
Unscrew the six mounting nuts and remove the bumper reinforcement from the body side.
